Guide on Multiplying Roses through Stem Cuttings
Do you own a plant that flourishes exceptionally well in your garden? Or maybe there’s a neighbor’s rose bush that has captured your fancy? Or even a cherished rose that is nearing its end?
This is the perfect moment to take a cutting.
With stem cutting propagation, you can reproduce your favorite plant. It’s a method to replicate that stunning floribunda that you simply cannot resist.

Here’s a reality check: The success rate for this method is typically around 50 to 75 percent.
Rose lovers are always testing out different ways to increase the probability of their cuttings thriving, and we can benefit from their trials and findings. That said, even the most adept rose growers often contend with this success rate.
But don’t lose hope! This just means you may need to plant a few extra cuttings to guarantee you achieve your target number. If more cuttings sprout than expected, they can make delightful gifts.
Furthermore, with this guide, you’re more likely to hit the higher end of the success rate range. We’ve gathered the best tips and experiences from rose cultivators all over the world.
Up next:
Is it wrong to feel excited about getting my hands dirty? If it is, I don’t want to be right. Let’s dive in!

Ideal Timing for Cuttings
A quick internet search will yield many sources recommending late winter or early spring as the prime time to take cuttings.
Some suggest summer, some vouch for autumn, and yet others argue that autumn is the worst possible time.
To put it plainly, there’s an abundance of conflicting advice out there! The truth is, the optimal timing relies on factors like your geographical location, local climate, your goals, and your specific circumstances.
While it’s possible to root cuttings during the growing season, the chances of success are highest in mild conditions, either slightly cool or warm.
Cold, frosty weather isn’t ideal, and neither is extreme heat, which can put undue stress on the plants. This typically points to spring and autumn in most temperate zones, and winter in regions where freezing temperatures aren’t a worry.
Many experts advocate for taking cuttings in the autumn, once the flowers on your plant have faded. This has been my most successful method, but keep in mind, it requires nurturing the cuttings indoors throughout the winter.

If you’d rather root your cuttings directly in the garden, opt for spring, once new growth has emerged. I’ve found this method to be most convenient when I don’t want to commit to caring for a plant indoors for several months.
In my experience, rose cuttings that are started directly outdoors tend to grow quicker than those started indoors and later transplanted.
Perhaps it’s because they have more time to adjust to your environment, and they don’t experience the stress of moving from an indoor setting to the outdoors.
Preparing Your Cuttings
Before you even approach the plant with your knife, confirm that the plant you’re sourcing the cuttings from is in good health. Steer clear of any plant exhibiting signs of rust, mildew, fungus, insect infestations, or other pests or diseases.
If you notice any of these issues on your plant, do not take a cutting.
Furthermore, avoid old, woody stems or soft, overly flexible material. Fresh new growth often appears red or purple. A touch of red (or young) growth is fine, but the bulk of the stem where you plan to make the cut should be green.

While it’s possible to source cuttings from both hard and young growth, I’ve found that these typically don’t root as successfully.
If you’re procuring cuttings in the fall, search for a stem that has a faded bloom or even the start of a hip, and ensure it has at least six leaf sets.
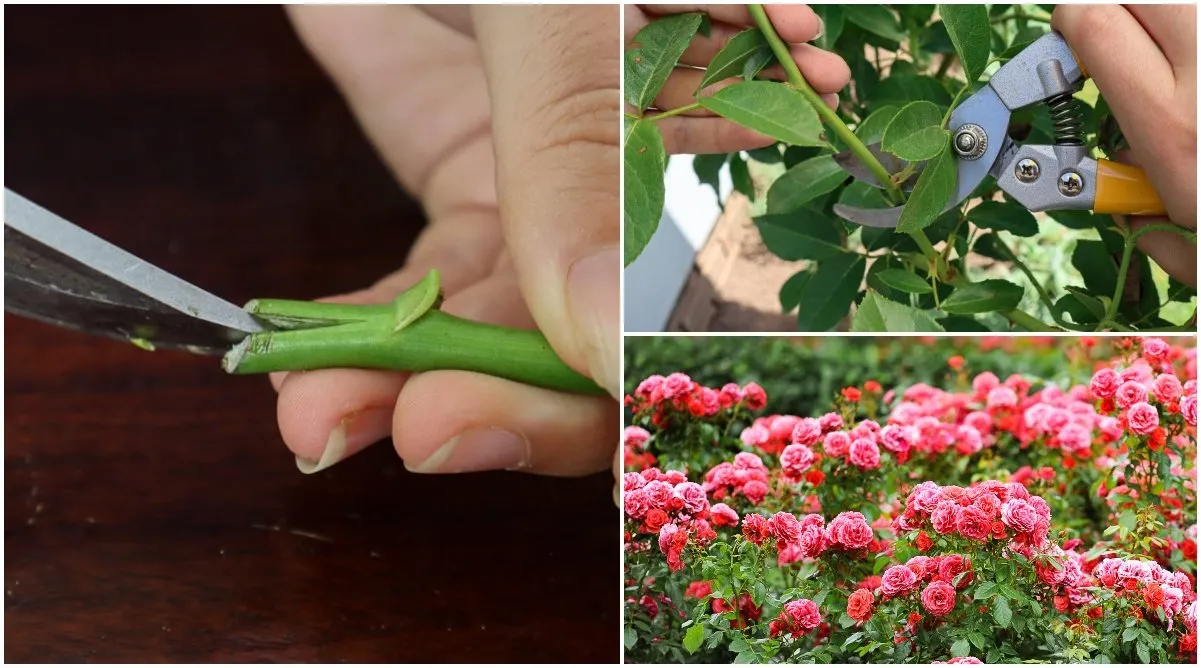
Choose an eight to nine-inch section from a region with pencil-thick growth, using a clean, sharp knife or clippers. Make the cut at a 45-degree angle. Repeat the process as needed.


